Mobexler
Mobexler is a customized virtual machine containing several preinstalled tools such as Android Studio, JADX, apktool and Frida. Its goal is to help pentesters or security researchers to perform security audits on Android and iOS applications with a ready-to-go environment. This virtual machine was designed and published by Enciphers
Objectives
The objective of this blogpost is to show you how to use Mobexler with VMWare and especially how to create an Android Virtual Device (AVD) with Android Studio. We used several times Mobexler during our workshops (BSides Budapest and OWASP AppSec Israel) to ease the process for attendees to have the same testing environment in order to perform the given exercices.
If you look at the Mobexler documentation, there is an article explaining how to setup Mobexler with VirtualBox and Genymotion. Even if we agree that Genymotion is a great tool to emulate Android devices, you need to register an account on their website and you can only use the tool for personal purposes. Anyway, we did not find a way to run an Android emulator with Android Studio using Virtual Box. If you have some insights, feel free to share your tips!
Steps
1. Install VMWare Player or VMWare Workstation
Obviously, the first requirement is to have VMWare software installed on your machine. It is possible to use the free version VMWare Player. If you have a license key, you can also use VMWare Workstation.
2. Download Mobexler
Then, you can download the Mobexler Virtual Machine at the following page:
The available options for download are from Google Drive or from One Drive (a Microsoft account is needed in this case).
3. Import the OVA file
With VMWare Player or VMWare Workstation, choose Open a Virtual Machine and then import the OVA file previously downloaded.
If the following error message appears saying the OVA file did not pass the OVF specifications:
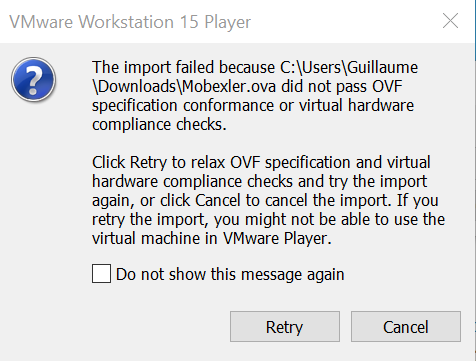
Just click Retry. It should work :)
4. Enable “Virtualize Intel VT-x/EPT or AMD-V/RVI”
After the successful import of the OVA file, you have to edit the Virtual Machine hardware settings of the Mobexler machine in order
to enable Virtualize Intel VT-x/EPT or AMD-V/RVI on the Processors option.

We also recommend to increase the size of the memory with at least 4GB.
5. Enable KVM permissions
After booting the virtual machine, there is one last step to perform before being able to create an Android Virtual Device (AVD).
We need to add our user Mobexler to the kvm group in order to avoid the following error message:

The following commands need to be executed in order to install qemu-kvm package. Do not forget to reboot the virtual machine at the end.
sudo apt update
sudo apt install qemu-kvm
sudo adduser Mobexler kvm
reboot
Note: It is not mandatory but you can also install the VMWare tools inside the Virtual Machine.
sudo apt install open-vm-tools-desktop
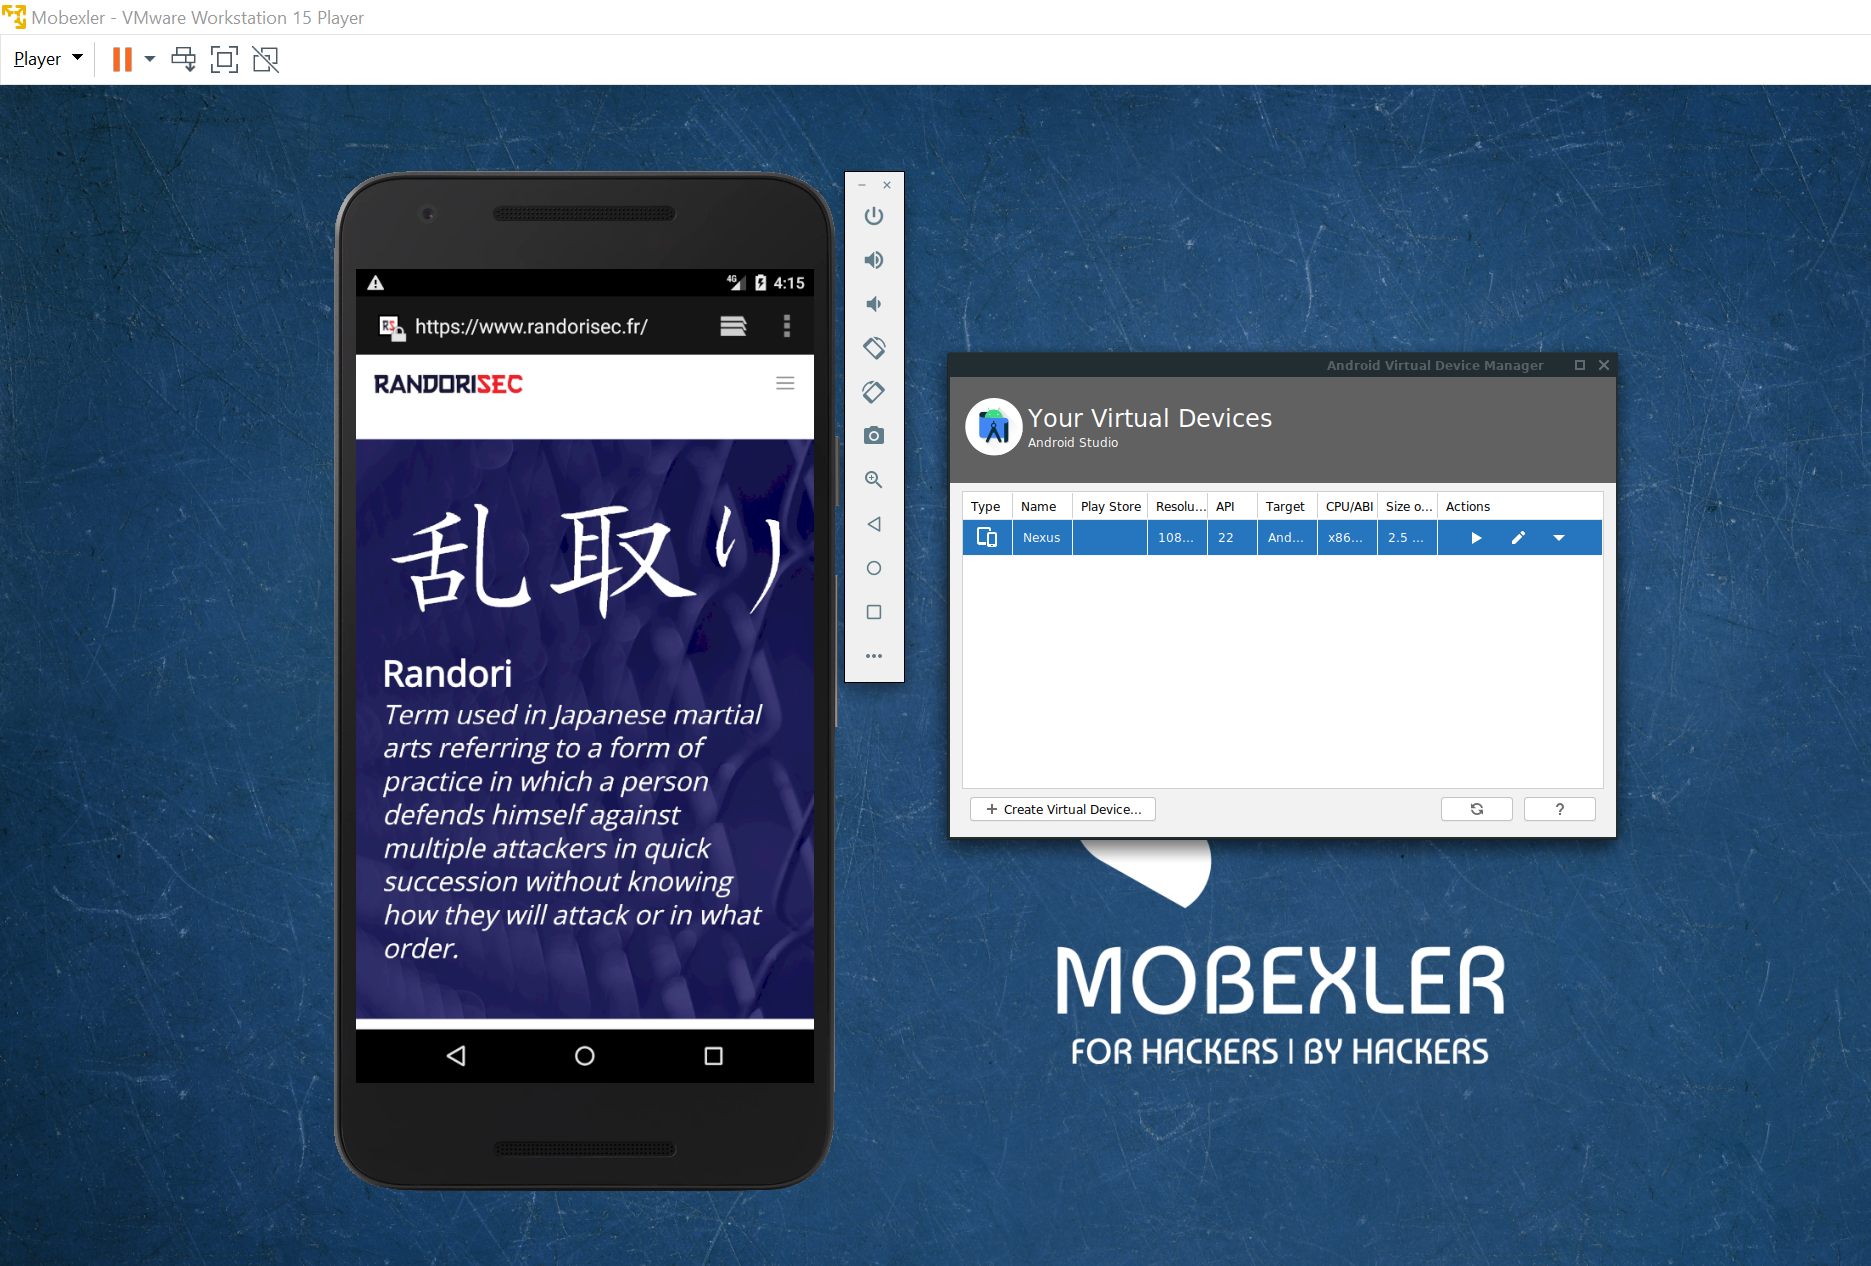
6. Create an Android Emulator with Android Studio
Last step, we can finally create our Android emulator using Android Studio.
On the last versions of Mobexler, when using the desktop icon, Android Studio is launched as the root user.
If the Android emulator is executed with root privileges, you are going to experiment some random crashes and instabilities.
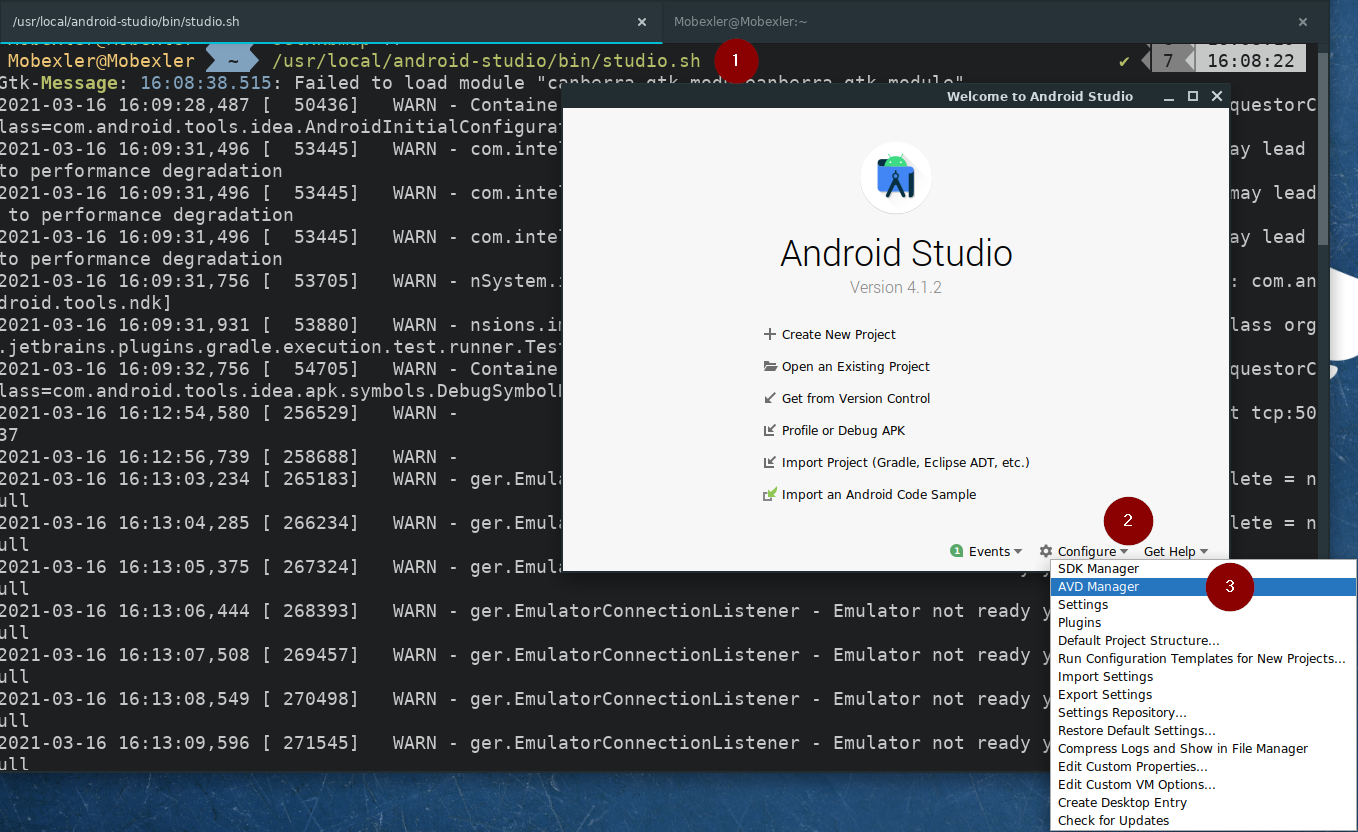
We strongly recommend to run Android Studio with the Mobexler user.
This can be achieved using the following command:
/usr/local/android-studio/bin/studio.sh
Then, you can launch AVD Manager to create an Android Virtual Device as shown below:
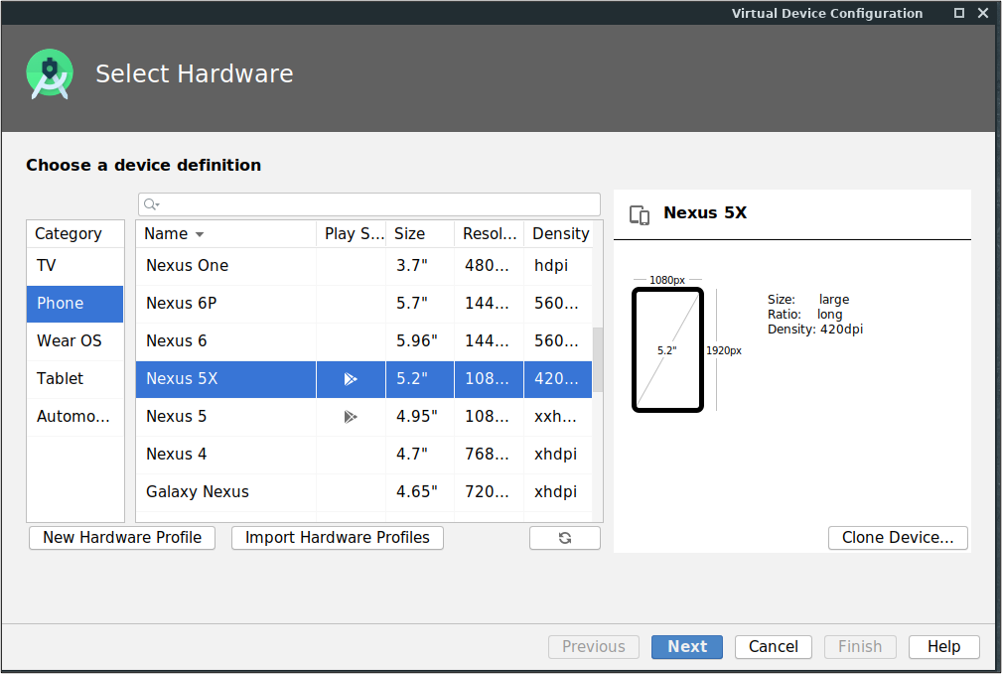
From this point, you can follow the wizard to create a specific Android device.

You can select the hardware (in this example, Nexus 5X was selected):
Another important configuration option is the system image used by the Android device.
In this case, we recommend to select a x86_64 image as shown below:
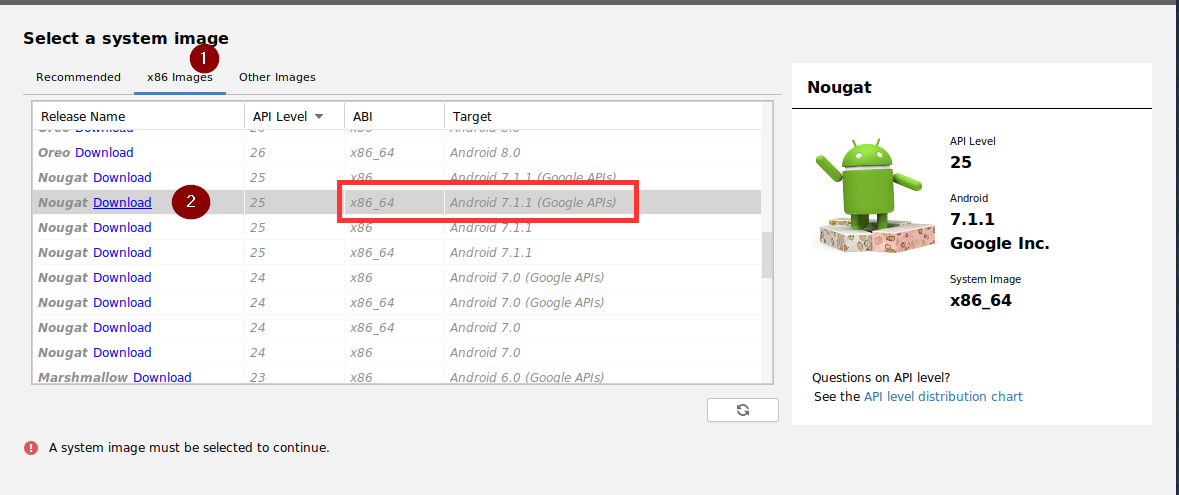
Note: If you want root privileges, do not select a system image where Google Play is mentionned.
Finally, give a name to your Android device and voilà! You can now launch your Android emulator!